 A rubber band bracelet is a band that people normally wear on their wrist or sometimes on their ankle for style or fashion. You can buy it from any street accessory shop or from any cosmetic shop n’ you can make it by yourself also. It can be in any shape: round, square, zigzag; though they mostly look nice in round shape but their designs and pattern may vary.
Both guys n’ gals can wear these rubber band bracelets, no matter what their age is. There is a saying that wrist bands help to reduce anxiety and many people wear rubber band bracelet for the same benefit i.e. you can control your anxiety with rubber band bracelets.
How to Make Various Types n’ Designs of Rubber Band Bracelets
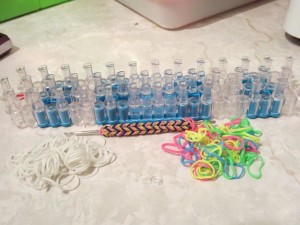
If you are not interested to buy these bracelets from the market and want to do something fun and creative then you can make your rubber band bracelet by yourself. First of all, let us see what basic material is needed to make a rubber band bracelet:
- Rubber bands
- 2-3 pens or pencils (or you can use your fingers)
- “S” shaped clip
So this is the basic material that you needed for all patterns of rubber band bracelets. Now let us start with the different types and shapes of bracelets which you can make by yourself:
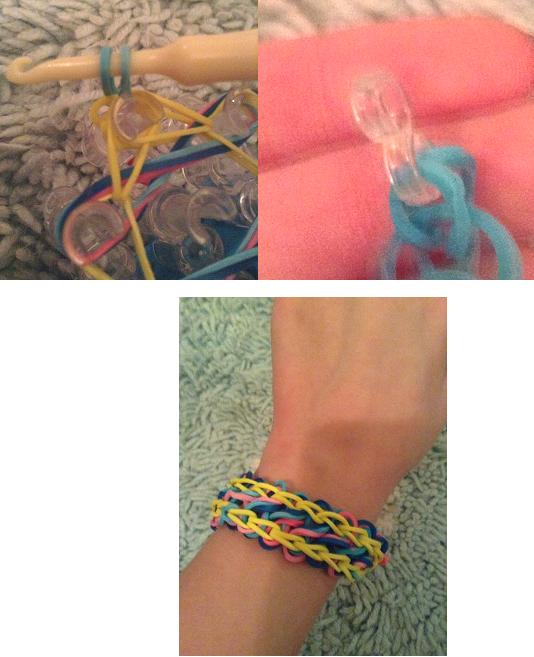
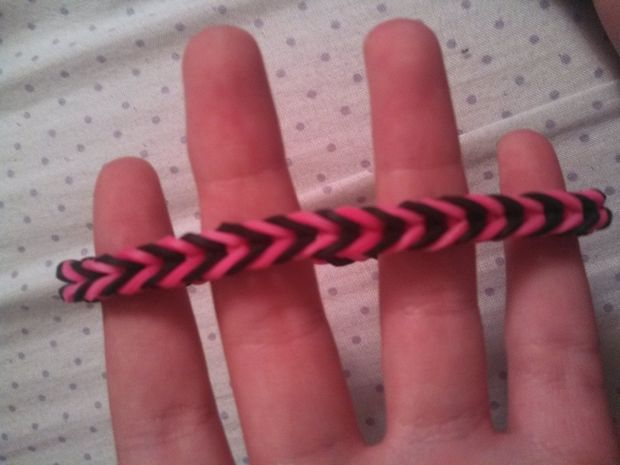
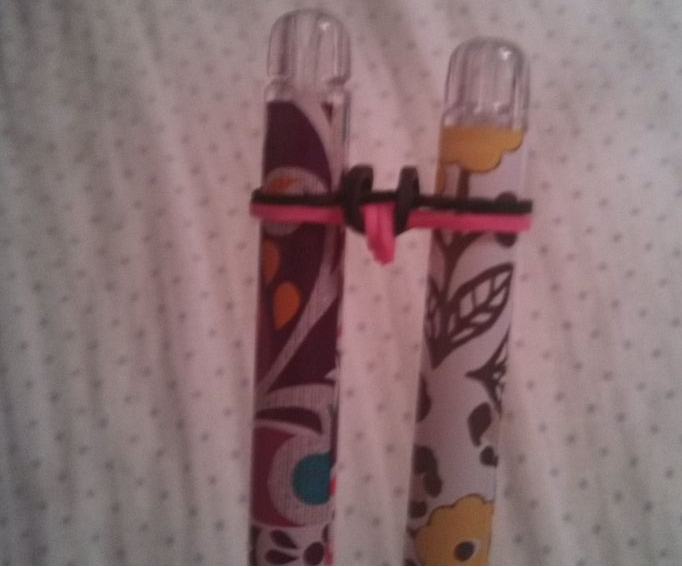
- Fishtail Rubber Band
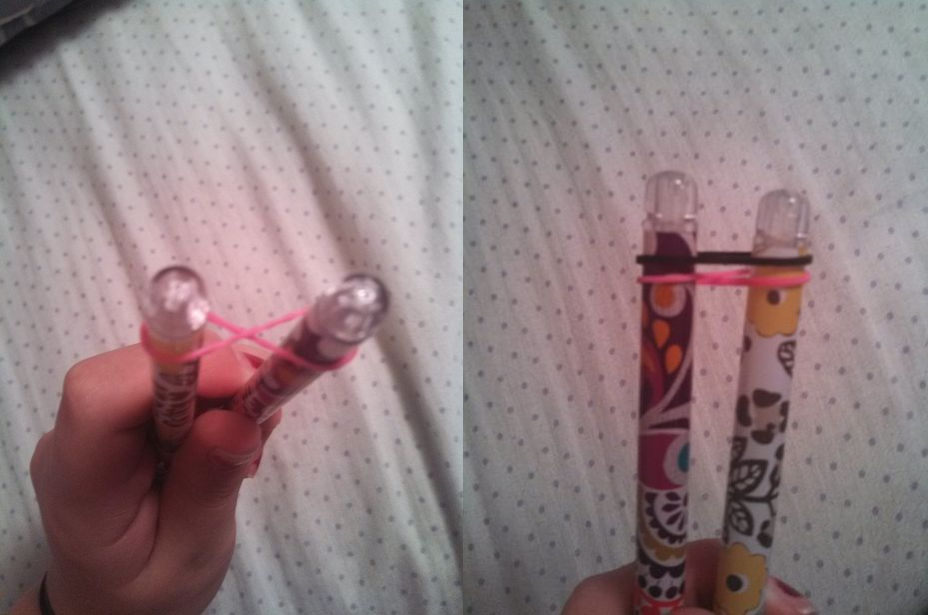
This type of rubber bracelet requires only the basic material i.e. it needs 2 different coloured rubber band, 2 pens and an “s” shaped clip. Now follow these steps:
 STEP 1: START
Place one rubber band on one pen (or whatever you are using as stick) then stretch and twist it and place it on the second pen. Its shape must appear as a number 8 or as an infinity sign. After this place two more bands over it but do not them now.
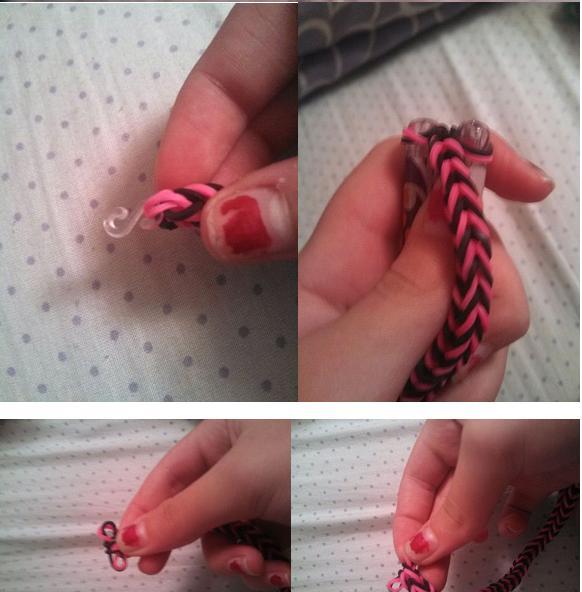
 STEP 2: MAKE KNOT
Now stretch the bottom band from one side (either right or left) and put it on the top of your pen one by one. Do the same thing with other bottom bands until the band bracelet is long enough to fit on your wrist.

 STEP 3: ATTACH THE S CLIP
Now attach the “s” clip to side where you have started making your band and slip off the pegs n’ slip out the two in the centre.
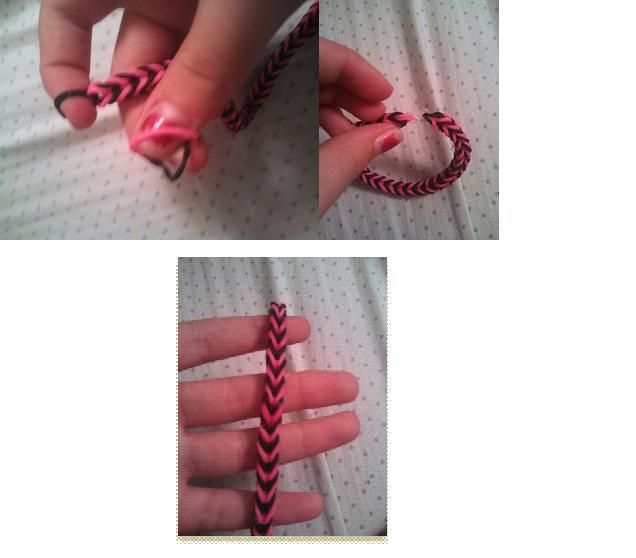
 STEP 4: FINISHING
Now attach the second side of your clip to the other part of the band and you are done with your fishtail rubber band bracelet.
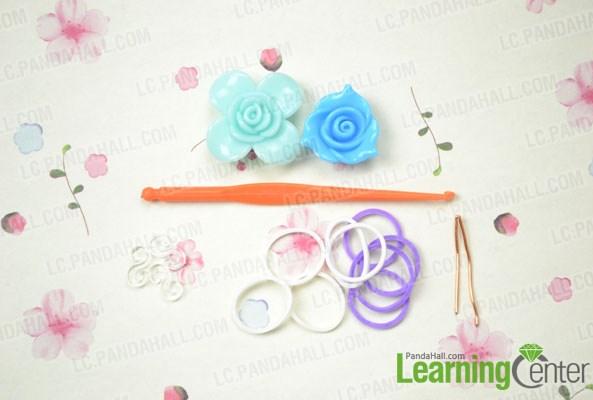
- Rose Double Cross Bracelet using Loom
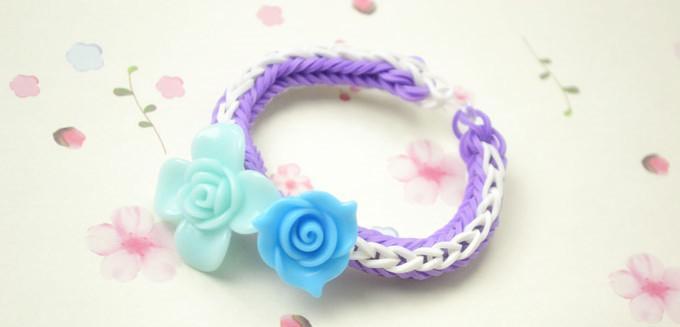
This bracelet is easy enough to make. After trying fishtail bracelet, you can easily make this type of bracelet. Firstly, let us see the material needed:
- 2 different coloured rubber bands (say purple and white)
- Loom hook
- S clip
- 2 flower beads
- 1 hook
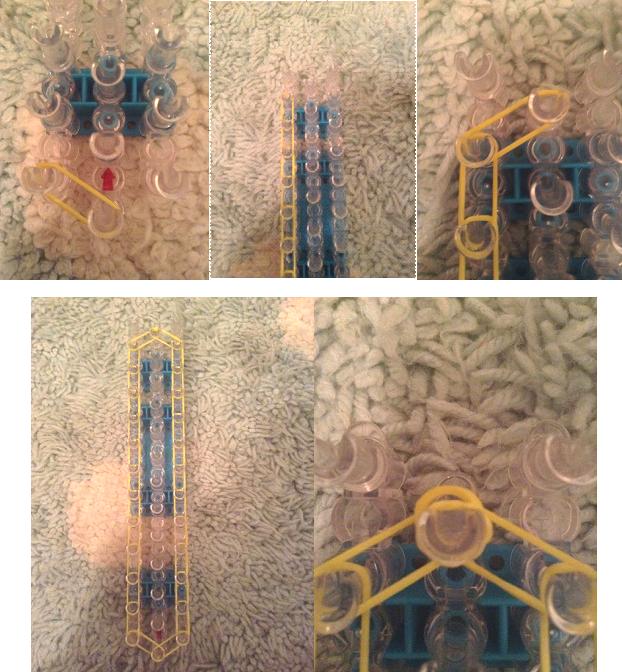
 STEP 1: START
Firstly, take a purple rubber band and put it on two clips of the loom and twist it. It must look like an infinity sign or a number 8 (in a horizontal direction). Now put two more purple bands on the two clips of the loom above the first band but don’t twist them.
 STEP 2: USE A HOOK
Now pull the bottom left band upwards with the help of a hook and make it loose n’ place it in the middle of the top two bands. Do the same with the bottom right part of the band.
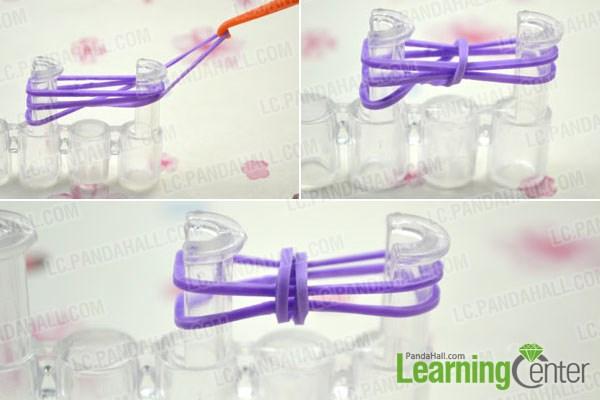 STEP 3: FINISH FISHTAIL BRACELET
Now add another purple band over the other bands and keep repeating above steps until the band bracelet is long enough to fit on your wrist. Here you are done with your fishtail bracelet. Take out the bracelet from the loom and take a white n’ a purple band in your other hand as shown
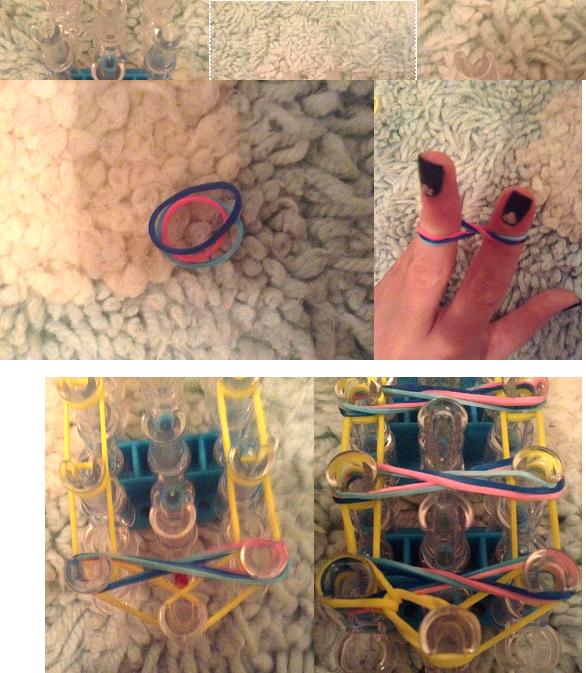
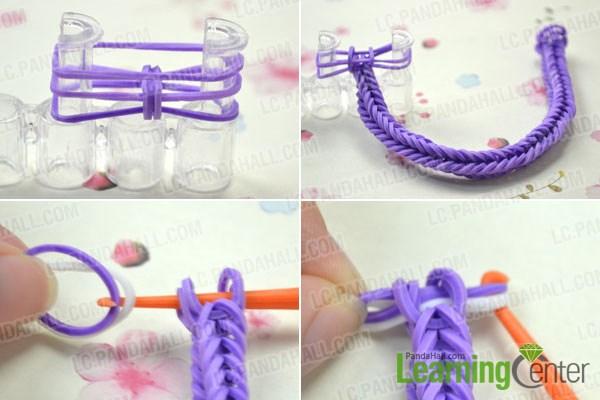 STEP 4: CONTINUE
Now place a hook in from the holes of the band and grab the white n’ purple band and pull it from the holes of the band. Now draw down the white band n’ slide bracelet with white band as shown in the image. Then get another white rubber band, touch and drag the fishtail to the rubber band, string hook via bracelet to the other side of the white band.
 STEP 5: REPEAT TILL IN CENTRE
Repeat above steps until it comes in the centre of the bracelet. Now string a white rubber band to a flower bead, go on to emerge two white rubber bands then add the second flower bead and repeat this step.
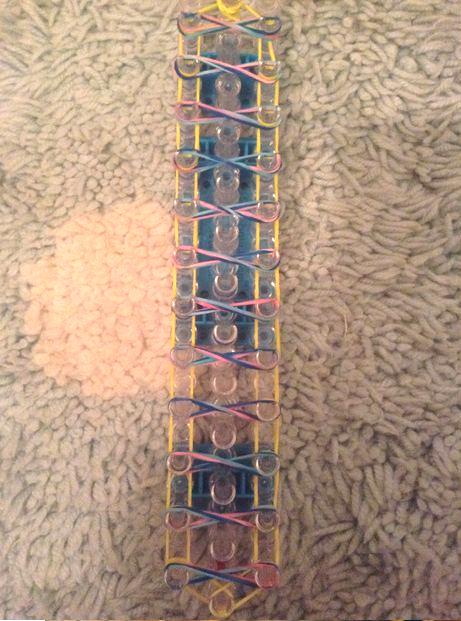
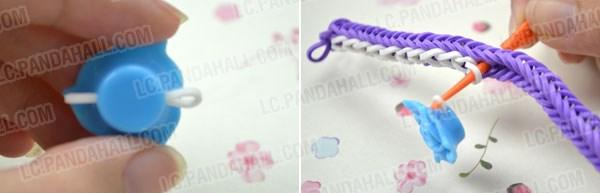 STEP 6: FINISHING
Keep on emerging the rest half white rubber band till it reach to the end of the bracelet. Now get one whiter band, touch and drag the cross emerge bracelet to the band, then use an “s” clip to connect both ends. Here you are done with your rose double cross bracelet.
- Taffy Twist Rubber Band Bracelet
This bracelet may be somewhat difficult to make for the beginners but do not lose hope and keep trying, it is not that much complicated.
 Let see for the material required to make taffy twist bracelet:
- A rainbow Loom
- S clip
- Rubber bands of different colours
- A hook

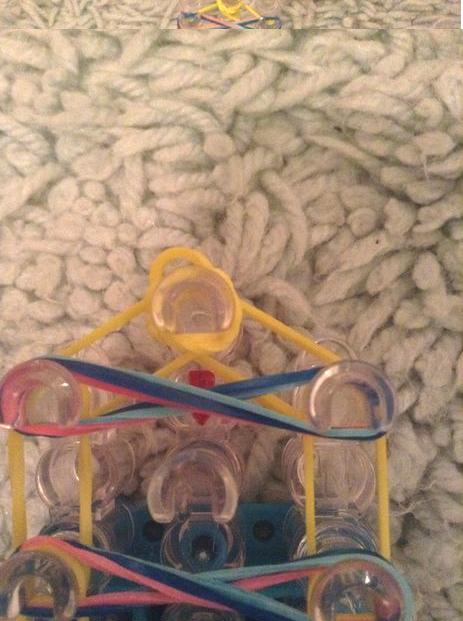
STEP 1: PUTTING THE BANDS
Begin with the red arrow opposite to you and put the 1st band diagonally out to the left. Now move in a straight line’ n chain up till second last pin. To finish this, take another band and get it into the centre. Do the similar thing on the right side. Now, put a cap band on the last or final clip of the loom.
 STEP 2: ADD TWISTS
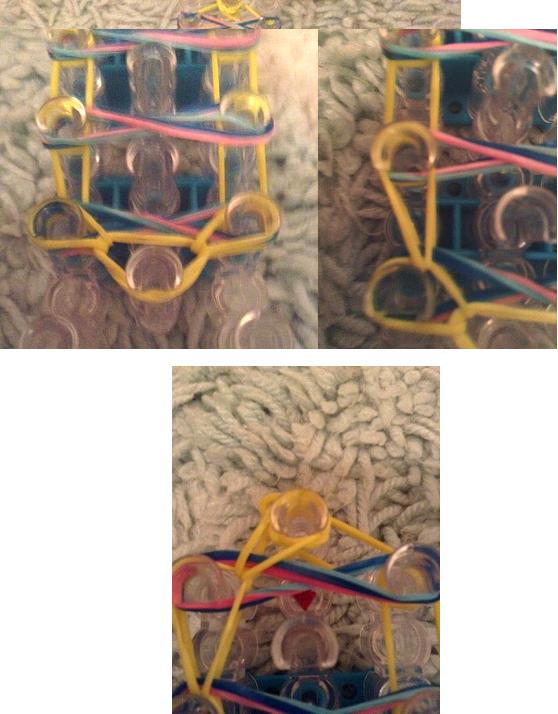
Twist the bands and they will go horizontally from corner to corner. For this, take 3 different colours of bands and twist them mutually into an infinity figure or an 8 shape. Place this crossways the loom on the clips of loom as shown in the picture. Continue this all the way up the loom.
 When you will finish these steps, it will be appear as below image:
 STEP 3: CAP THE BRACELET OFF
This step is quite easy, you just have to turn over the rainbow loom so that the red arrow is now facing you n’ cover a one border colour band in the region of your hook two times.
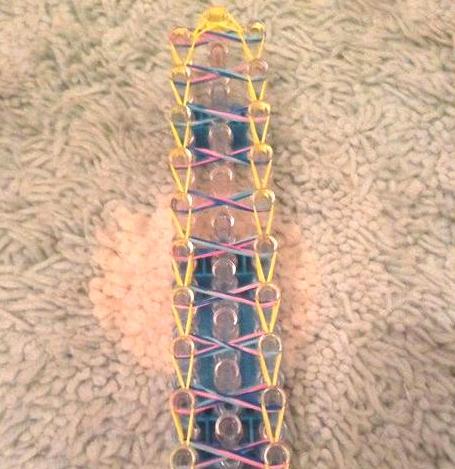
 STEP 4: LOOMING METHOD
This step is also very simple. For looming, take a hook move beneath the cap band and pull the 1st yellow band and clip it to the left. Now reach under and pull the right side band and get it to the right side.
 STEP 5: FINISH LOOPING THE BANDS
Now it will look like this when you are done with your looping
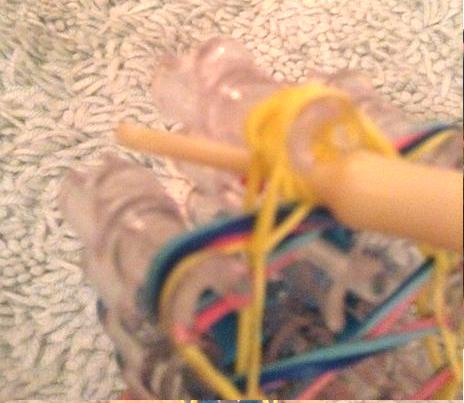
 STEP 6: MAKE A SLIP KNOT
This is also very simple. You just fix your hook in the channel and move under all bands then take a single border colour rubber band n’ put it at the end of the hook. At last grab it through n’ put both of them on the hook.
 STEP 7: FINISH IT
Pull the band off which is far away from the red arrow n’ makes it tighter. Now take your bracelet out of the loom and you are done with your bracelet.